Hey ! We’re talking about hot thing here 😉 Well, no jokes, I am going to shares my thoughts on the Philips 40″ 4K BDM4065UC screen. I will try to give you a slightly different overview of the beast that what has been done by others.

Unboxing
I got the swiss version of the screen that includes :
- Swiss power cable
- European power cable
- VGA cable
- HDMI cable
- Display port cable
- Analogue audio jack cable
So it has no :
- Mini DP cable
- USB 3 cable
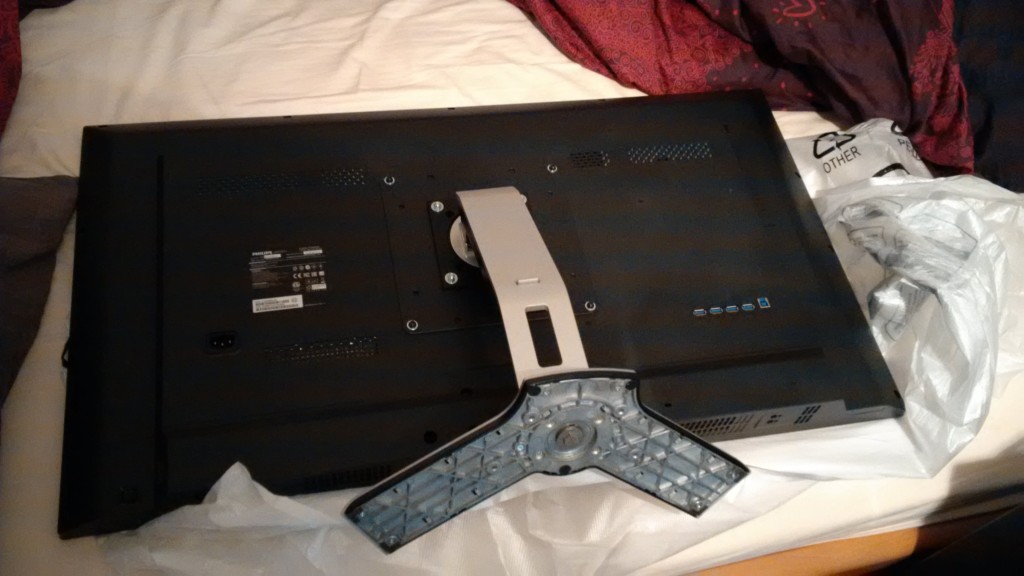
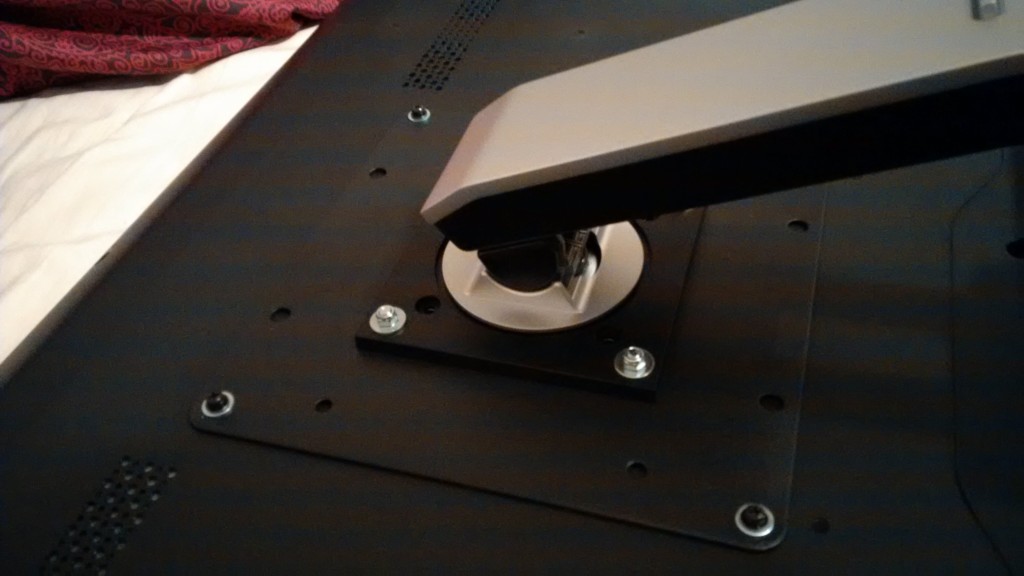
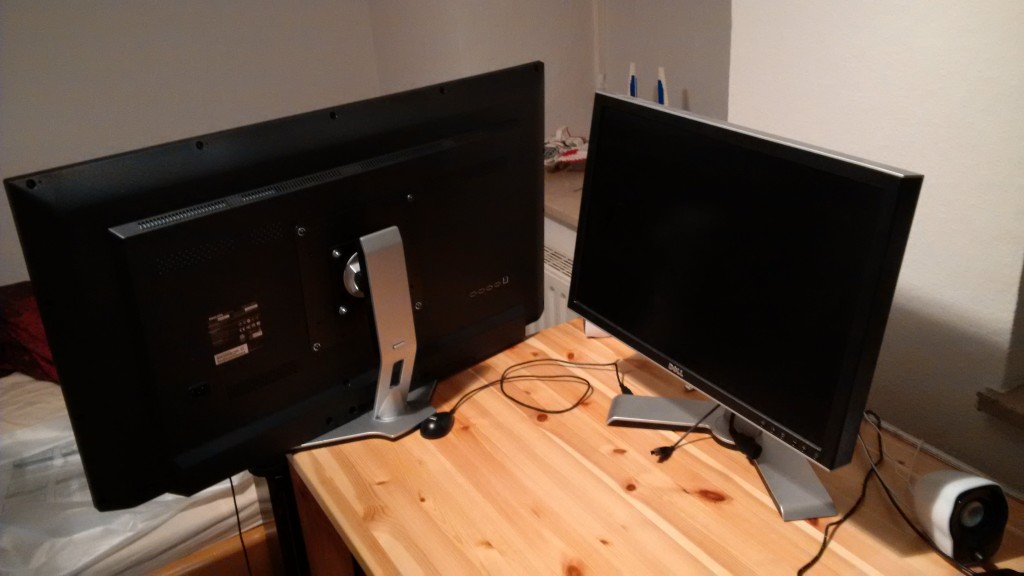
The box comes with enough screws to mount the screen on a VESA support. Here is my setup :
So basically a Dell 2408 stand with VESA adapter, VESA extender to reach the 200*200 screen format, and voila ! The screen is too heavy so it naturally fall down, but it gives me rotation and possibility to give some angle, which is pretty interesting, all this having a normal stand.
PS. Dell, if you read this… I was going to by the 34″ U3415W… But… No, not anymore. Sad you did not though about 40″ 4K screen.
First start
Well, that is… huge !! Going from a 24″ screen, I am just lost in the available space… First things to do, install the drivers, Smart Control (why not) that Philips proposes, and create custom resolutions. See here if you own a ATI (AMD – hoping they will do better on cpu’s…) card.
Once this is done, remember to set up the screen with the TFT Central colour profile.
After that, you’re basically good to go.
Desktop
For the desktop I ended up in using SmartControl to split the screen in a 1 : 2 configuration, leaving a quite 1920*2160 vertical window on the left, and 2*1080P windows on the right. Works quite ok, but SmartControl definitely needs to be improved (it messes up quite a bit with games and full screen movies, meaning better to shut it down then).
It for sure leaves a huge space for working, well, 4*HD screen, ain’t bad no ? Notice that the DPI at 110 makes the texts somewhat small to read so text size is something to adjust at some point.
I would highly suggest to sick to a DP 1.2 setup to get 60Hz on it, I tried to see what a PbP setup looks like with 2 1080P signals, but there is some latency when crossing the border between the 2 images and that gives an awful feeling. This kind of effect have been related on first 4K screen reviews using multiple inputs to render a 4K image. I will refer to jphughan from Hardforum:
I seriously doubt this will work. To make it really work, the display would need two controllers with each one set to expose half of the display area out of a single port (which is basically how MST displays work), and this display won’t do that. Picture By Picture isn’t the same thing, since that just scales down a larger signal to fit in a smaller space. MAYBE if you configured custom resolutions for each of your PC’s HDMI outputs and enabled MultiView, you’d be ok, but I’m betting that this won’t work as intended, and even if you ended up with an image that filled the entire display and had everything properly proportioned, the display’s scaler would be engaged to deal with Picture By Picture, so you’d probably see some artifacts from that. The bottom line is that you really need a DP 1.2 interface capable of 4K @ 60 Hz via SST to drive this thing at its native resolution; there are no workarounds.
One word concerning audio : Do not expect anything from the analogue input, it’s legit crap. If you want to get some quality, use the audio from HDMI or DP, then it’s rendering a pretty good sound – of course if you previously had a pair of 2.0 speaker that you wish to replace by the screen speakers.
Gaming
Setup :
4770K / 4Ghz
16GB
Z87 Deluxe
2*7970 Ghz
To sum up… Welcome to the jungle ! While some tittles work with no issues in 4k, some are having issues, I mean, not like pure FPS issues where you feel the GFX is too slow, more like optimisation/compatibility issues.
Games tried so far (all settings maxed, no AA – not really needed anyway) :
- LoL : over 1920*1200, experiencing crashes, lag… 4K is purely unplayable. 2560*1440 is somewhat “OK” but still crashes often.
- Bioshock Infinite : 3840*1440 fine, 4K is a bit low in fps
- Alien Isolation : 4K OK
- Evolve : 4K OK – High settings (probably around 30-40fps)
- Dying light : 3840*1440 OK, a bit laggy sometimes but very playable
- Tomb Raider : 4K OK
- Diablo III : 2560*1440 OK, don’t accept 21:9 res, 4K bit laggy
- CS GO: 4K OK
- Portal 2 : 3840*1440 OK
- H1Z1 : 3840*1440 OK
As you can see, creating a custom 21:9 resolution allows to play quite many games with good quality, and loosing vertical vision is not such a big deal. Dealing with 3840*1440 is nice as it’s showing in native (no upscaling) and taking the whole screen width. Not that playing in 2560*1440 just equals to have a 27″ screen centred in the middle of your 40″, which ain’t bad anyway.
If you wish to play with upscaling, I would recommend to upscale from 2560*1440, the result is quite good, not as crisp as native but not ugly aswell.
Please note that these feedbacks from from a Crossfire setup. Single higher end card Such as 290X or 980 are likely to experience less issues and provide more even gaming experience.
Final words
So far I am pretty happy with that huge screen, but it will take time to master it. A jump from 24″ to 40″ is just “crazy”, and you need to learn about using the space.
Contrast is just mind blowing, sometimes even too much if you are used to the more common 700:1 or 1000:1, but you really rediscover games and movies with such image quality.
110DPI is crisp enough if you are not too keen on AA (I was, not anymore). Gamma shift happens a bit on the screen corners, so make sure to be in front of the screen part you are using. Obviously in a more TV usage, this won’t happen.
Summing up, the price/quality ratio makes it THE screen to get for the moment. I was highly considering a Dell U3415W but I’m really happy with that purchase.
If you wish to consult test/forums, you can check the following :
Enjoy !
PS. Don’t hesitate to react in the comments, I will be glad to add useful content to this review if asked 😉
comments powered by Disqus


